
Sports Entry Inflation Instructions:
1. If it's windy, or blowing over 15mph, don't set it up! Even if the wind is not blowing, the entry should be anchored at all times. (Stakes and rope are not included but can be purchased at the lumber yard.) A sudden gust of wind could blow over the entry and cause damage to it or the people around it. Inflatables of this size can generate tremendous forces and must be used with caution.
Use Only with adult supervision. This means keep the minors away.
Your new sports entry will attract a lot of attention so be sure it is attended at all times.
2. First, lay out the entry on the ground and locate all anchor points, zippers and blower openings.
3. Locate the inflation tube and attach to the blower by tying securely around the air outlet. Be sure all of the Velcro openings and zippers are closed. Note: some entries will have two inflation tubes but only one is needed for inflating, the other should be tied closed. Plug cord into 110v AC and begin inflating. Note: On long runs of extension, a heavier cord may be needed. To avoid electrocution hazard, NEVER expose open cords to water or damp areas.
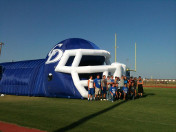
4. As the tunnel inflates it will fold up like an upside down taco. Stand workers on each side of the tunnel and as it inflates have them walk toward the center until the tunnel is standing up. You should then fasten the Velcro entry and exit flaps which are used to help hold the tunnel in shape. Note: be sure to have people with ropes holding on to the tunnel to be sure it doesn't blow away. Once the tunnel is inflated you can secure it to the ground using the stakes and anchors. Anchor points are provided on the bottom of each side, and mid way up on the tunnel. DO NOT anchor using the optional banner attachment points. Use only the designated anchor points. There are also zippers located on each side for sand bags for added weight. NOTE: Failure to anchor securely will most likely end up in a damaged product and a really bad day and can result in either death or injury!
Note: Do not "over pressure" the entry. The blower provided is designed to inflate your entry rapidly and can exceed the design limits of your product. To reduce pressure, slightly open some the Velcro closures.
5. After the entry is inflated, and secured, be sure to keep someone nearby to prevent accidental deflation. The entry will be a natural photo opportunity and with kids running around, the blower could easily become unplugged.
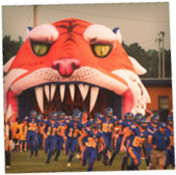
When the players are lined up in the blast tunnel ready to take the field be sure the area in front of the entry is clear. 220pound linemen and 90 pound cheerleaders don't mix!
6. When ready to deflate, simply unplug the blowers and open all zippers.
7. To store: dry thoroughly, and roll up from end like a tube of tooth past. Note: If the entry is stored damp, it may mildew. Store in cool dry place away from sunlight.
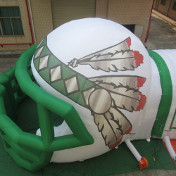
Special note for inflatable sports helmets: Your helmet has both inner and outer zippers. During inflation, the inner zippers should be closed, and the outer zippers must remain open. Failure to leave the outer zippers open will result in the outer liner pushing the inside of the helmet down. If this occurs, deflate helmet and re-inflate with outer zippers open.